Plaster molds can be very useful in the studio to make multiples of the same object. When I make a handbuilt plate, I will drape a piece of clay over the plaster, trim the edges, and add a foot while it’s still on the mold, upside down. I then let the clay stiffen up so that it is able to hold its form, which is when I will take it off the mold and flip it over.
In this post I will show how I make a one-part plaster mold. This example shown is a plaster hump mold for a plate. I threw the plaster mold on the wheel and I will make a cast of it, allowing wheel thrown elements to be translated to handbuilt plates.
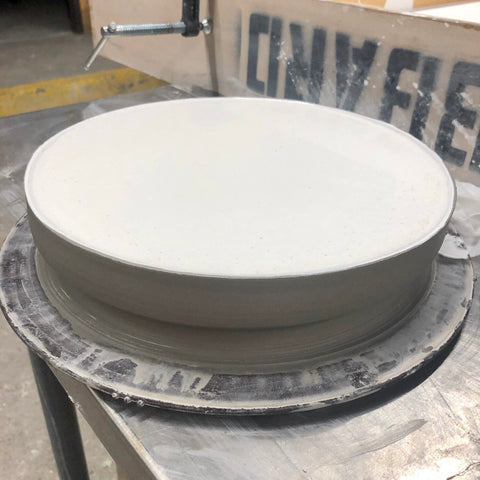
 Plate mold from above.

You’ll want the mold walls to be about two inches tall.
This form was thrown on the wheel, with much attention brought to the inside of the piece, as that is what will be casted. I threw a gentle plate curve and added a rim edge for the plate. I then added straight walls going up about 2 inches or so (you can go thicker if you want, but I wouldn’t go too thick, as the mold will be heavy). I made sure to pay a lot of attention to the inside of my wheel thrown form, as that will be the final imprint on the clay slab you use on your hump mold.
Let the clay dry to a point where it is leather hard and stiff, where your fingerprint does not show when you touch it. If you see your fingerprint, let it dry longer as it is too wet and will not hold its shape when you cast it. Take some time here to smooth out the clay and get rid of any unwanted marks and ensure a nice smooth mold.
You can coat the inside with a thin layer of Murphy’s oil soap, but it is not necessary. It does help prevent any sand, grit, or other particles from sticking and embedding into your mold, but the clay will still peel away without it when the plaster is set.
 Line a bucket with a plastic bag to help you easily remove and discard the excess plaster.

Number One Pottery Plaster “island”.
When you’re ready to cast your mold, you will want:
-
Two 5 Gallon buckets
-
Number One Pottery Plaster
-
Warm Water
-
Trash Bag
-
NIOSH Respirator that is approved for fine particulates (this is super important, don’t use dry plaster without it!)
Put on your respirator and don’t remove it until you have the dry plaster put away after the form has been cast.
Line one bucket with a trash bag so you can easily discard excess plaster and the plaster contaminated water you will wash your bucket with later.
NEVER PUT PLASTER DOWN THE SINK (you will end up clogging the inside of your pipes and have to either replace them or get the plaster out of your pipes - not a fun job). Lining a bucket helps preserve your bucket and makes it easy to discard the plaster later.
Add water to the lined bucket, this will be your rinsing water. Eyeball the volume of water you think you’ll need for your mold and add the warm water to the second bucket. This will be the bucket to which you will add the plaster.
Take your plaster and with two hands gently rub a handful of plaster into the non-lined bucket, letting the dry plaster gently fall into the water. Keep doing this until you get a little island in your bucket that doesn’t immediately disappear.
 Slowly move your hand around to break up plaster chunks.
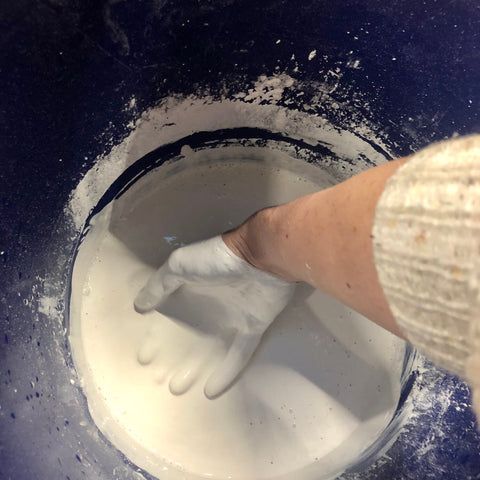 Keep your hand in the shape of a “c” when you’re stirring the plaster.

You’re looking for a consistency like thick whipping cream.
When you have your island of plaster, you’ll want to start mixing the it gently with the water. You can use your bare hands, as plaster will not harm you, but it can dry out your skin. I prefer to not wear gloves because I feel it allows me more control to break up the plaster and not add too many bubbles while doing so.
Mix the plaster with one hand in the shape of a “c” (see above) and slowly circle and gently break up the chunks with your hand. You don’t want to stir too much or too vigorously, as you will incorporate more bubbles in your plaster. You are looking for a consistency like thick heavy whipping cream. If you think your plaster is too thin, feel free to add more plaster with your other hand that is dry.
When all of the large plaster chunks are dissolved and you have a thick whipping cream consistency, the plaster is ready to be poured into your mold. Make sure you act quickly, as plaster does set within 5-10 min.
Pour CAREFULLY and SLOWLY into the mold, pouring just at the edge of the mold. This let the plaster slowly fill the mold and helps reduce air bubbles.
 Close up of bubbles you want to get rid of.